Core concepts
Quoting
How to create and manage your projects in Bizmantools.
Location: Quoting -> Quote Projects
Projects
Bizman Quoting is all about creating projects, these projects start as Quotes and then once accepted become Sales Orders (or Orders for short). Quote projects can be copied, and you can even export projects to other Bizman installations. Everything revolves around the project, from projects you will get:
- The Quote report you send to your clients
- Cutting lists for the factory
- Purchase orders based on projects converted to
Orders
Projects are the starting point for everything in Bizman.
Making a new project
To make a new project navigate to Quoting -> Quote Projects. Top right you will see the project control hub, this is used for Creating, Finding, Deleting projects. 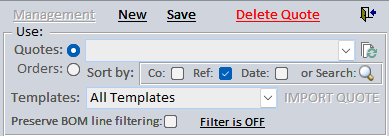 To start a new project, simply press
 NEW on this control hub. The next section to load is top left, called the Project Header
To make a quote you need to follow these steps:
- Add Customer name
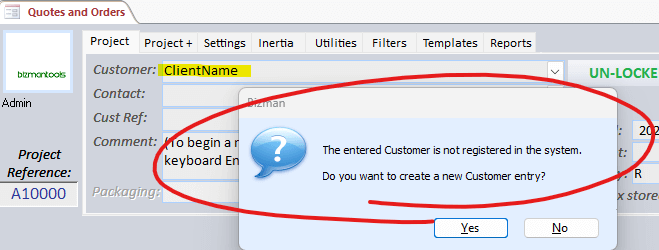 This will open the CustomerDetails screen (located Quoting -> Customer Details), you could simply press
 Save + Closeas a minimum, OR enter a Contact person (Name, Last Name, Email address) thenSave + Close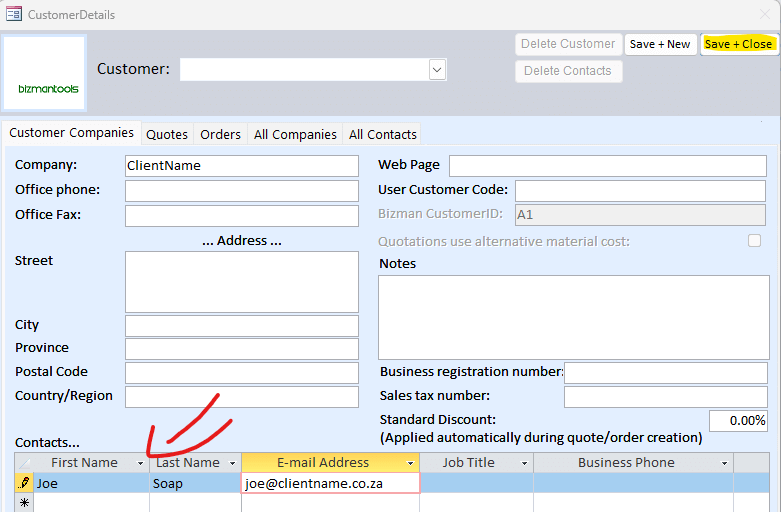
- Enter the Contact (You just made it in previous step)

- Enter the Customer Reference (The name of the project)

- Any comments and press Enter in that box

If you were making a new project at this point you'll move on to Line Items the section further down this guide, however the following section covers the topic on finding existing projects (opening a project that's already been made)
Finding existing projects
Finding projects is very simple, we do this in the control hub top right. First set whether you are looking for Quotes or Orders
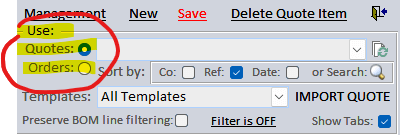
Then simply click the drop down box to view existing projects and select the project you want to open.

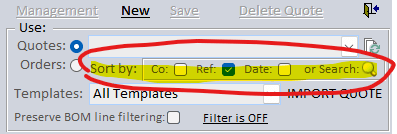
Note you can also sort the projects by:
- Company
- Reference Number
- Date
- Search for a specific reference
Quotes vs Orders
Projects are either in the state Quote or Order. They always start as a Quote and once the job has been accepted and is moving into production you will change it into the Order state. The way to toggle between them is using the Project Header Quote/Order toggle: 

Converting Quote to Order
Toggling from a Quote Project to an Order Project does 3 things:
● Changes project to a Sales Order
● Locks the Project so no new work can be done
● Locks Prices so the project uses it's own special table of prices
Project Header

- On the left you see which user is logged in ('admin')
- Below that you see the
Project Referencethis is the unique Quote Identifier ('A10000') - Several Tabs (Project, Project+, Settings, Inertia, Utilities, Filters, Templates, Reports)
- Customer: This is where you enter the name of your client
- Contact: This is where you enter the name of the contact person for your client
- Cust Ref: Short for Customer Reference, this is where you enter the name of the project
- Comment: This is where you enter any comments you want to appear on the quote, you also press enter in this comments box to open the rest of the screen.
- Unlocked/Locked: This tells you whether the project is locked or not.
- Quotation/Order: This tells you whether the project is in the Quote state or Sales Order state
- Range Markup ON: This tells you if you're using the newer Ranged Based Markup and it opens the project specific markup settings.
- Created: The date this project was created
- Discount: View and set the discount for this projcet
- Currency: The displayed currency on the quote report (different to currency shown on screens inside Bizman)
- Rate: The currency conversion factor you wish to use
- Sales Tax: Displaying the current sales tax
Line Items
Projects are made up of line items, these are the actual quoted items, usually made from drawings but can also simply be a Manual No BOM (like a travel cost).
Types of line items
Line Items come in different types, namely:
- 2D Drawing
- Manual No-BOM
- User Formulae (soon to be deprecated)
2D Drawings come from the drawing screen and will be your casement, shopfront, curtain wall items that you have drawn.
Manual No-BOM, as it's name implies has no drawing, nor does it have any bill of material, it's simply a name and a cost.
User Formulae, was the original quoting system in Bizman and allowed users to quote on items following a user created formulae (based on the width and height of the item, add x amount of this material etc.)
You set this before starting a line item using the drop down in the middle of the screen, it's normally set to 2D drawing.

$BlankTemplate vs Templates
The very first thing you need to do is select either:
- $BlankTemplate (Empty canvas to draw anything)
- A Template (A premade drawing to use a starting point)
On a brand new Bizman there won't be any templates made.
Adding a new line item
There are 3 things you need to do to create a line item.
- Select the
Template - Enter the
Item Name - Tick
Create

Item Name is simply the name of the line item, examples: W01, W02, SFD01, D01 etc.
Create is used to initalize the item in the software. You only ever do this step once.
Ticking Create will automatically open the Drawing screen but this is not how you will open the drawing screen for items you have already made.

Opening existing items
To open an existing item (get to the drawing screen), either press 'use this item' or simply double click the drawing!
Drawing screen
After ticking the Create Tickbox from the previous step, this will open the drawing screen for you. Remember to not use the Create tickbox to open the drawing screen again. Simply double-click a drawing to open the drawing screen again.
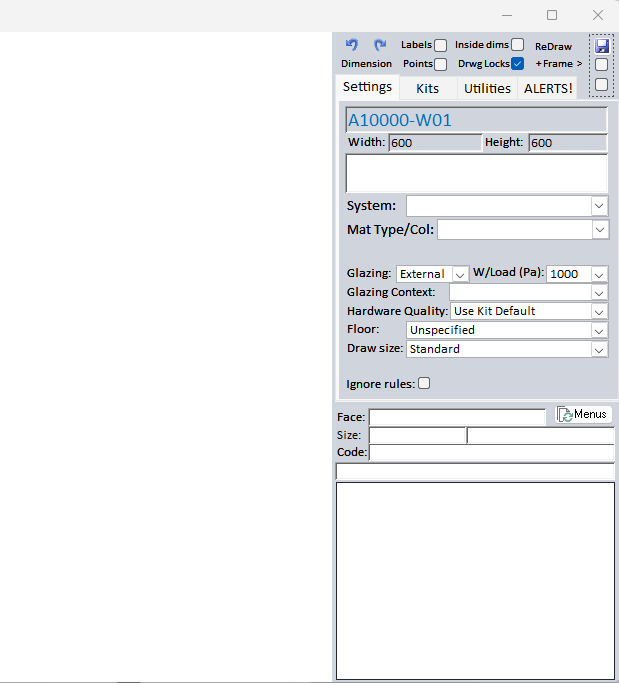
The drawing screen is made up of 2 parts, the canvas on the left (a blank white space) and the Drawing Menu on the right.
For the basics you simply need to do 2 things.
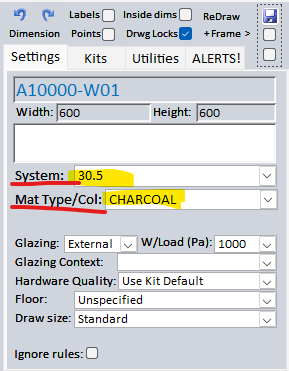
- Select a system
- Select a colour
System refers to the aluminium system, i.e Casement 28 or Shopfront etc.
Mat Type/Col refers to the type of material or more commonly the colour.
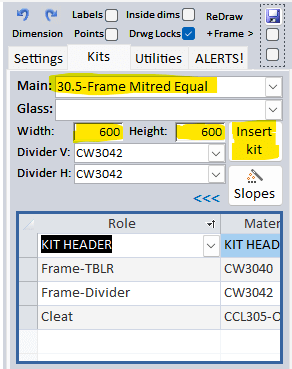
Then under the KITS TAB select a starting Frame Kit: In this case we are selecting the 30.5 Frame Mitred Equal kit.
Enter a WIDTH and HEIGHT and press INSERT
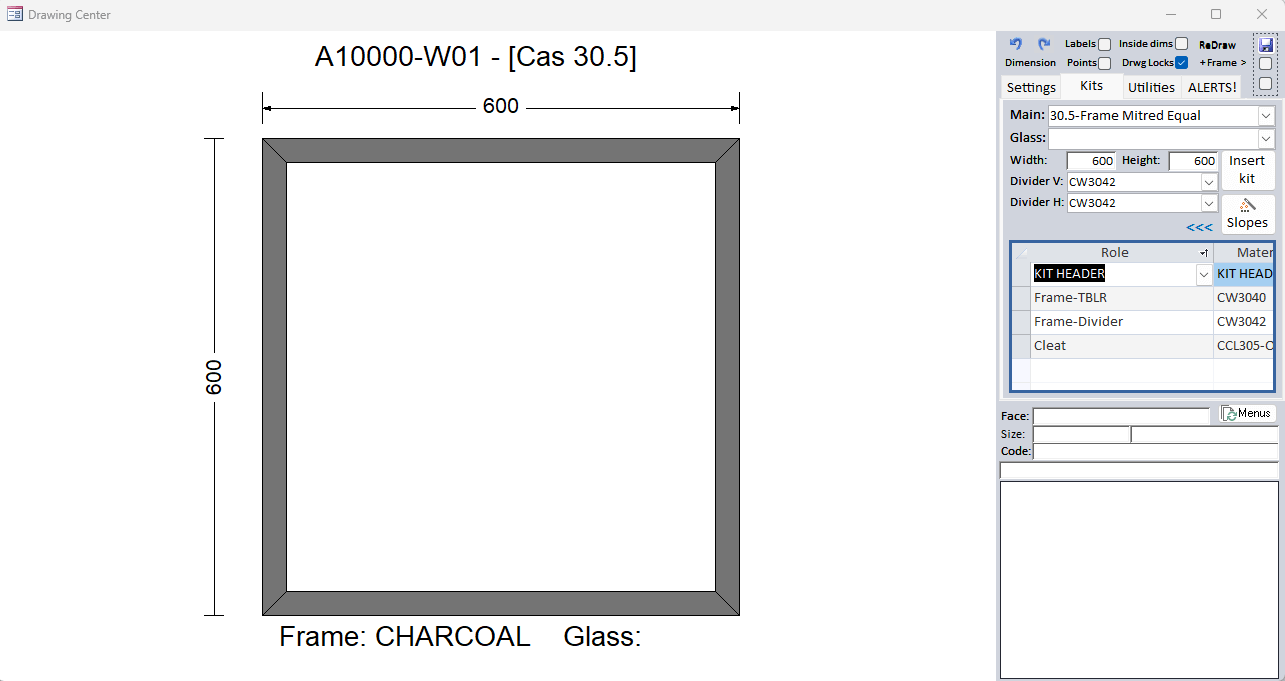
You will now have started your drawing, there will be a frame on the canvas. Note there is nothing in the frame, it's just the frame itself. (with an empty opening in the middle)
Left click inside the opening to highlight it yellow, then right click.
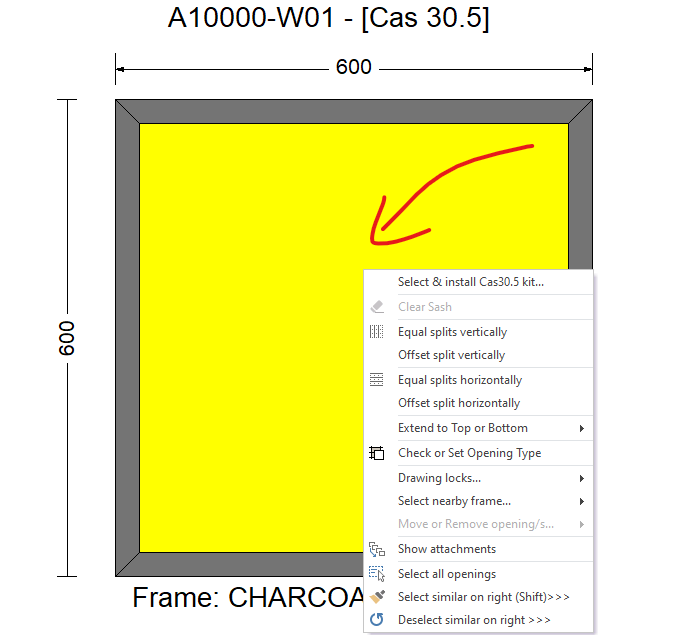
Select the first option "Select & Install Cas30.5 kit..."
This will open a menu showing frame-content kits (kits that go into openings)
Select a kit, a glass, a glass type and insert.
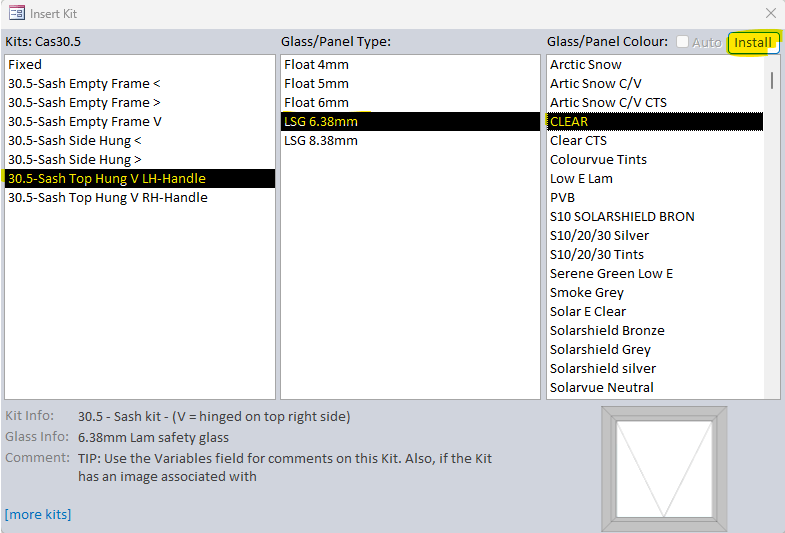
Now you have a simple casement sash!
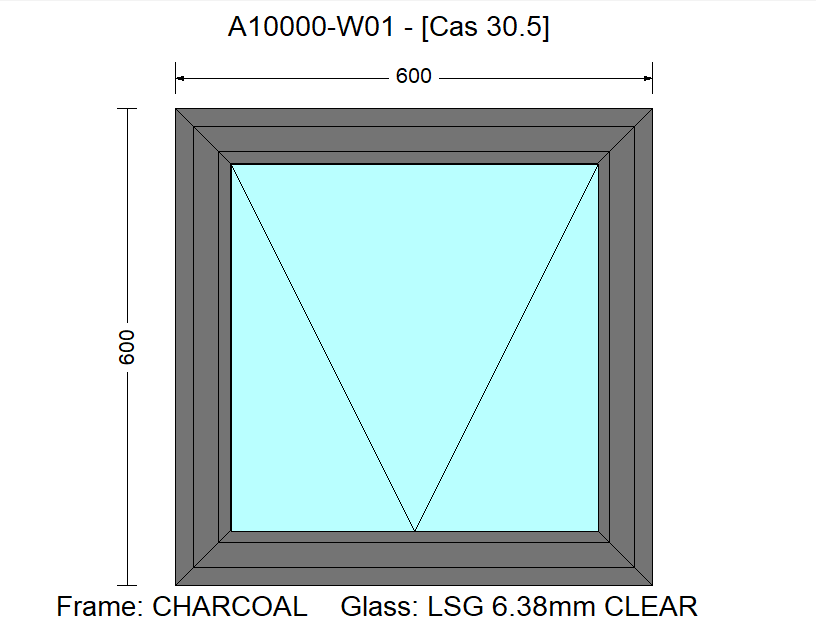
Close the Drawing screen to get back to Quote Project screen. The save button and close is top right, don't worry if you don't forget to save, Bizman will prompt you to do it.
Reports
Reports are the product of the quoting system, this is the output you want after creating your projects and filling them with line items! The most important report is infact the Quote Report! This is what you send to your clients and is the main purpose of the Quoting Module in Bizman. There are other very useful reports like Window Schedules and Job Cards.
The Quote report
On the right of the Quote Project screen are your financial tabs, these breakdown the cost of your quotation. You will see every value is set to R0, this is by design and is part of network safety to ensure you don't accidently communicate wrong prices to a client while other users are working on the same project.
To get the up to date figures, simply press the Recalculate Button (it's red)
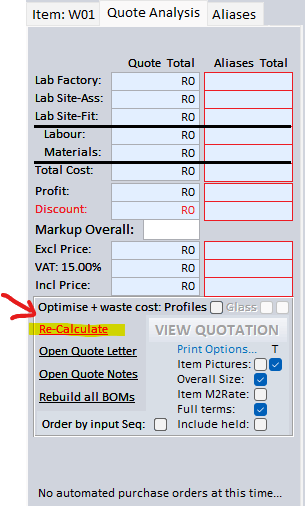
Once you have recalculated the quote, you will see the financial tabs display the financial breakdown of the quote.
To view the report: Press VIEW QUOTATION
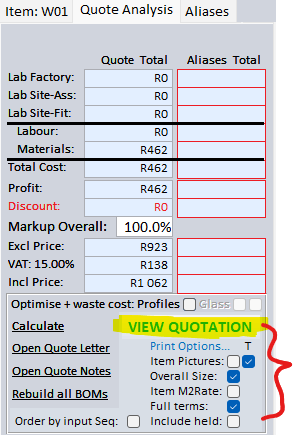
Also note the Print Option:
- Item Pictures: Thumbnail vs Full size vs No pics
- Overall Size: Display item overall size (width + height)
- Item M2Rate: Display the rate per square meter (normally not sent to client)
- Full Terms: Display the Full Terms or not
- Include Held: Include on the quote items put on hold
- Order by input Seq: Order the quote items by the sequence they were made (overriding the automated item sorting)
The PDF preview page has a menu with options for printing, emailing and exporting as PDF, also has options to view 2 or more pages at a time. Useful when inspecting a quote report.

See quote report below, with full size images, I added a couple more drawings. Only showing the first 2 pages for illustation purposes.
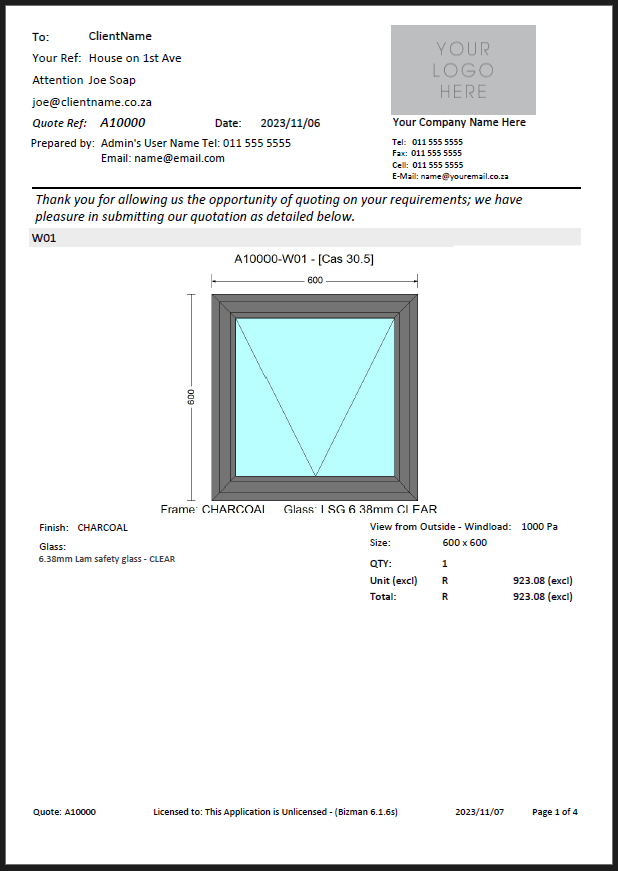
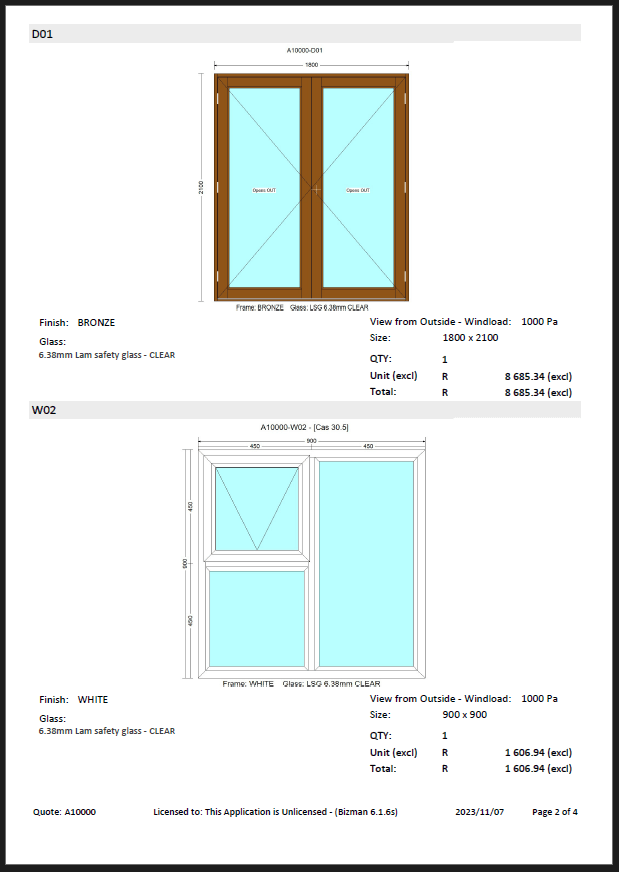
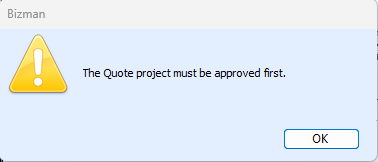
If you try to email, or export this quote Bizman will ask you to Approve Quote Project this is part of the extensive user permission system for networked users. In this case simply press OK and Bizman will show you where to approve the project.
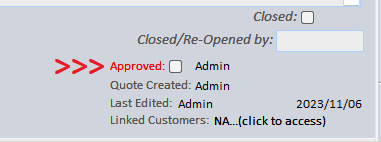
Tick the approved box, and you will be able to email, or export this quote report.
Window Schedule
Window Schedules are a great way to see your drawings all displayed on one report. It displays 4 per page and there is also a current item window schedule which will only show you the selected item.
On the project header section, the Reports tab, you will see Window Schedule button with some options, as well as a Current Item button.
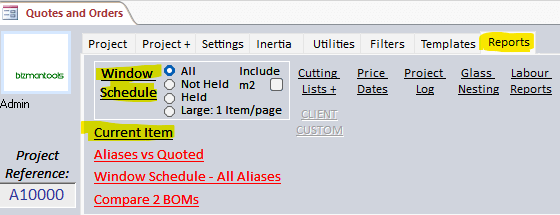
For the below example I added 3 additional drawings.
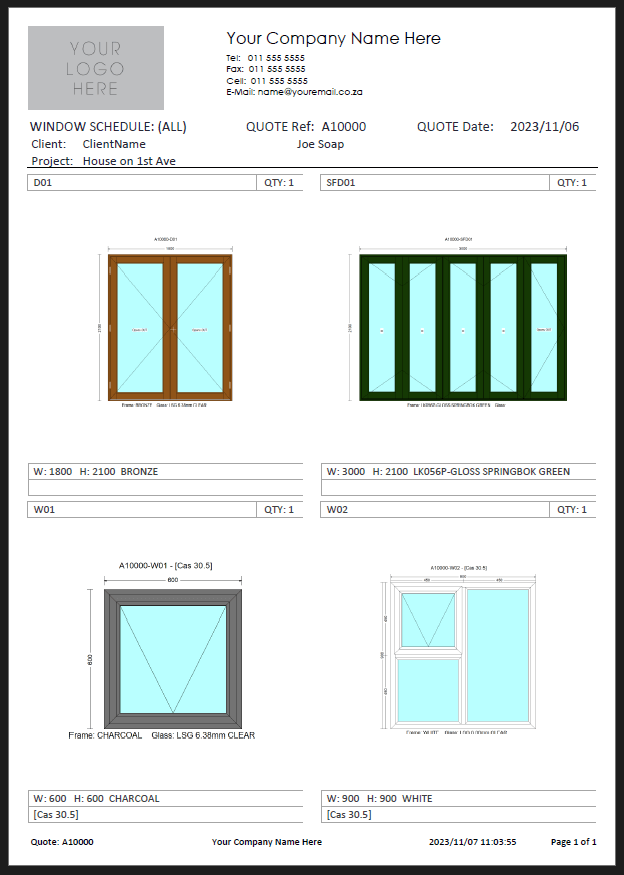
Job Cards
Although Job Cards is techincally part of the Cutting Lists part of the core concepts. It's a collection of reports that are available from the Quote Projects screen.
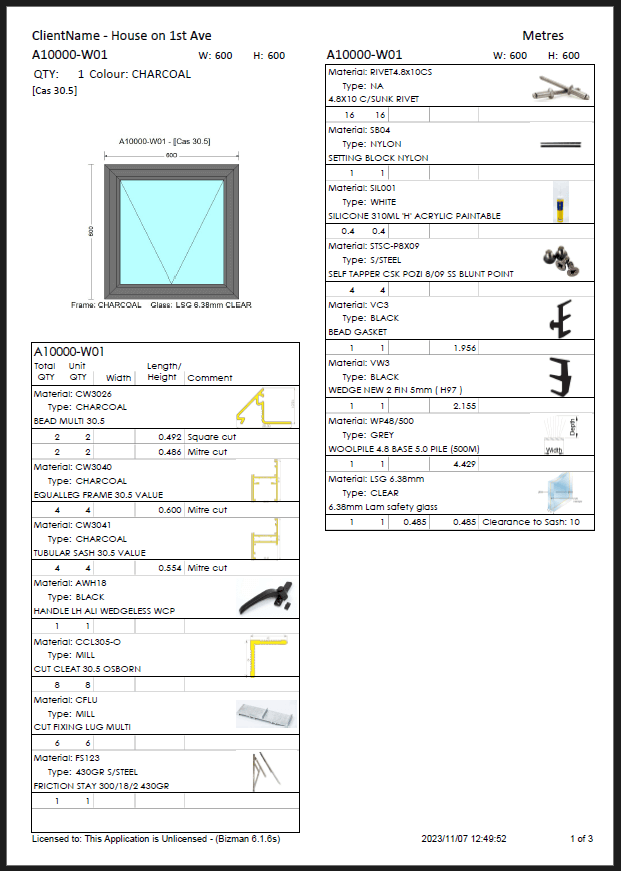
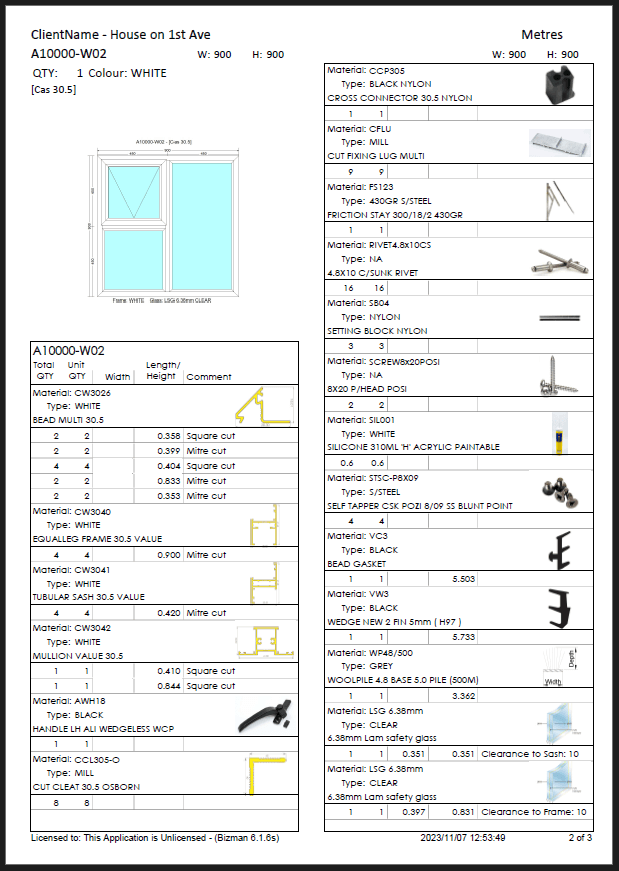
Job cards are what is known as Non-Optimised Cutting lists meaning they simply tell you what lengths you need to cut but does not tell you HOW to cut. This is in contrast with Optimised Cutting lists which tell you how to cut your stock lengths to achieve the least amount of waste with the best offcuts!
On the project header section, the Reports tab, you will see Cutting Lists + button.
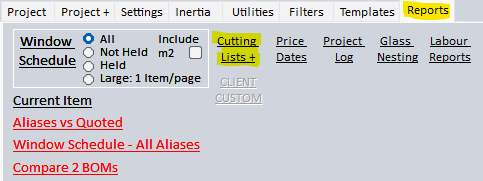
Opening the Cutting Lists + screen will allow you to select the items you want (left click the items), select the desired output and press print.
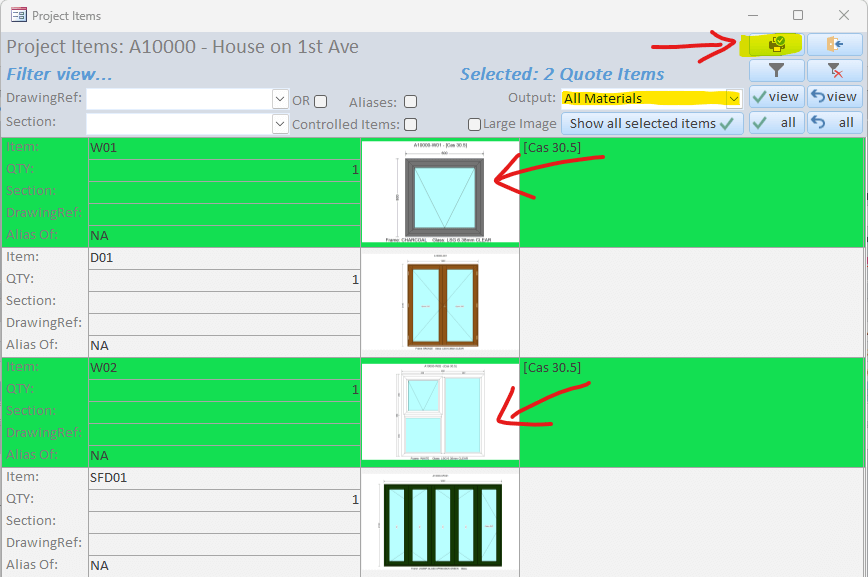
You will then have the job cards report:
