Introduction
Installation
Installing Bizman is an incredibly easy process!
Let's have a look at the Basic installation steps, as well as the different types of installations such as Networked and RDP Servers. We will also cover some more advanced topics like understanding the Bizman file structure, moving Bizman from one computer to another and managing backups etc.
Is Bizman already installed?
If you have already installed and licensed Bizman following the getting started guide. You might not need to go through this chapter, this guide is aimed at providing additional information on the basic setup and assisting with more advanced setups.
Basics
Click here to download Bizman. Alternatively go to the Bizmantools Website and download it from there.
How to install
Once you have downloaded the setup zip file onto your computer. Right click the file and 'unzip' it. You could use the Windows 'extract all' feature available when right clicking the zip file.
Simply run the Bizman Setup.exe file by double clicking it, and press 'Accept/Next' on the subsequent installation screens, there are no special options to select here or decisions to make.
The installer will then proceed to install the Bizman local files as well as the Microsoft Access Runtime.
You will then find a Bizman shortcut on your desktop that looks like this: 
After double clicking the shortcut you will see the Bizman Login screen: You can enter your
- Username (The default is 'admin')
- Password (The default is 'admin')
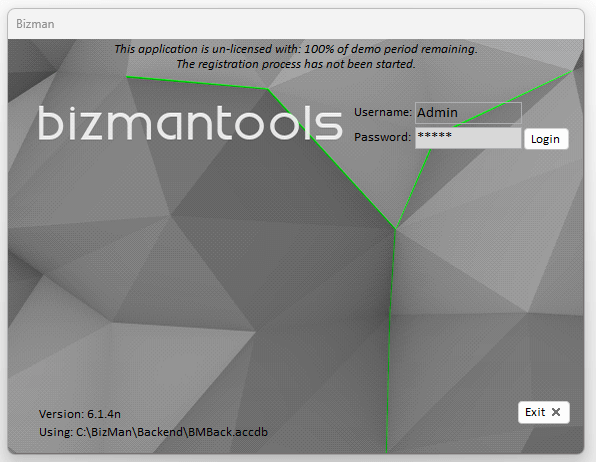
Then press Login!
Your password is 'admin'
Before you're licensed, bizman will auto-fill your password. However once you've licensed, you will need to type in your password! The default password is 'admin'.
When you login you will be prompted to update to the latest version with a message like this: Press Yes.
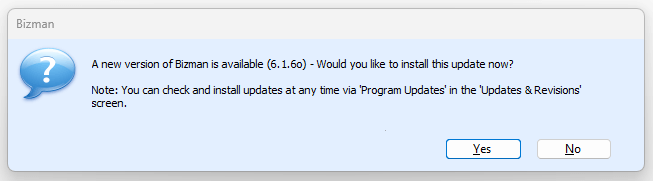
Bizman will automatically update to the latest version and install "Revisions".
Revisions
Revisions are special updates to your Backend Database. You will learn about these in more advanced courses!
After updating to the latest version and installing revisions, your Bizman app will restart!
Login again, your Bizman may check for additional files as this is your very first update!
When you login you will see a message telling you to load a supplier pack like this: 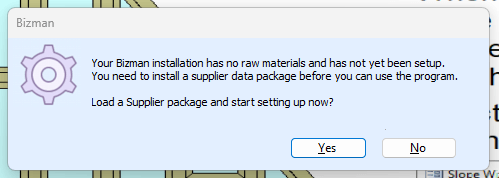
Press YES
This will take you to the Installed Suppliers screen.
Location: System Admin -> Installed Suppliers
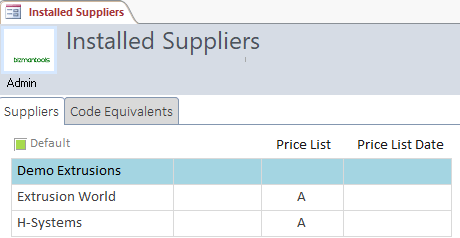
Select your preferred default supplier from the table and press install on the right of the screen.
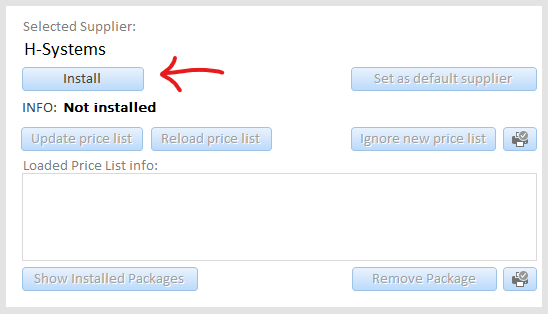
Bizman will check on the internet for the latest supplier package, this contains their raw materials, pricelists, and kits. This might take some time depending on your internet connection.
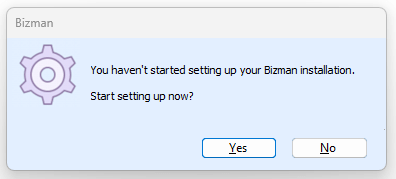
Congratulations! Your Bizman app is now fully installed. At this point Bizman will be asking you to go through your Basic Settings to ensure your Bizman is properly setup.
We will cover Settings in the Core Concepts section of this site.
Environment Variables
This topic covers the 'settings' outside Bizman, that belong to the operating system.
These are your computer time and date settings as well as your currency settings.
On your computer, navigate to:
Start -> Control Panel -> Change date, time, or number formats
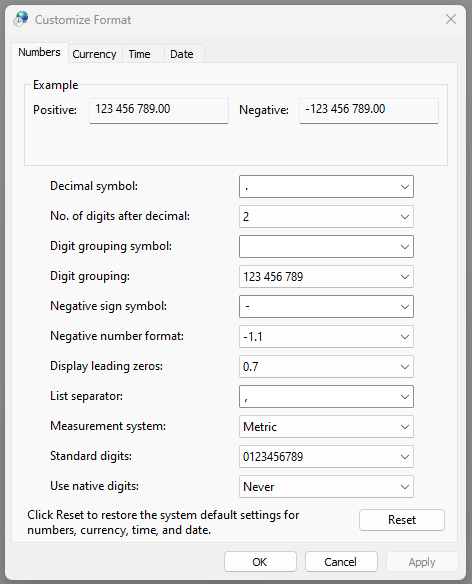
Under the Formats Tab, Select Additional Settings...
In the Customize Format form that pops up, under the Numbers tab.
The Decimal Symbol should be a full stop ( . ) not a comma or any other symbol.
List Seperator should be a comma ( , ) or a semi-colon ( ; )
Under the Currency Tab, make sure your currency symbol is what you want it to be. For example, R for rands if you're in South Africa.
If your Bizman is showing dollars in your costing screens, it's because your computer has $ set as the default currency.
Types of Installations
There are a few different ways of setting up your Bizman app, namely Standalone, Networked and RDP Servers. Each method has it's own pros and cons.
Standalone
This is the default setup, which you will automatically have upon completing the standard installation steps outlined above. This means your entire Bizman, the frontend (the app) and the backend (the database) is located on your own pc.
Your data is not shared with anyone, but you are free to work from anywhere. The performance of Bizman is dictated entirely by your pc.
Networked
A networked Bizman setup allows you to share 1 database with all your users. Sharing your Raw Materials, Settings, Kits, Quotes, Cutting Lists, Purchase orders etc. Allowing multiple users to work on the same database at the same time. You could even have multiple users working on the same quotation at the same time!
Network Setup can't work remotely!
NB! Very important to note with a networked setup, if you are not connected to the network, you can't work! You need a live connection to the server pc to access the database. This means you can't work remotely! See RDP section to learn how you can work remotely.
The way to setup a Networked Bizman is to first do full standalone installations on ALL pc's involved. However do not register all of them for licenses, simply pick 1 Bizman/PC to be the server and license that Bizman for a multi-user license. (This is handled when signing up your account with Bizmantools via email correspondance)
Once Bizman is fully installed on every pc, and the main Bizman (server) is licensed for multiple users then follow these 3 simple steps below.
On the Main Bizman Server:
Step 1. Share the Bizman folder
Locate the Folder:
- Open File Explorer.
- Navigate to
C:\. - Find and right-click the
Bizmanfolder.
Share with Everyone:
- Select ‘Properties’.
- Go to the ‘Sharing’ tab.
- Click ‘Advanced Sharing…’.
- Check ‘Share this folder’.
- Click ‘Permissions’.
- Click ‘Add…’
- Type
Everyoneand click ‘OK’. - Highlight ‘Everyone’.
- Under ‘Permissions for Everyone’, check ‘Read/Write’.
- Click ‘OK’ to close all dialog boxes.
- Finished! The folder
C:\Bizmanis now shared with 'Everyone'.
Remember, giving 'Everyone' full control means any user can read, write, and delete files in the folder. Adjust permissions as needed for your use case.
Take note of the Server Name:
Take note of your computer name and the share path, it will be shown to you after sharing! It will be something like \\ServerPC\Bizman
Step 2. Change the paths in the bizman.ini on each pc.
Locate and Open the File:
- Open File Explorer.
- Navigate to
C:\Bizman. - Find and right-click the
bizman.inifile. - Select 'Open with' and choose 'Notepad' (or your preferred text editor).
Locate and Edit the Paths:
In Notepad, find the line that starts with
BackDBPath=.- The line should look like this:
BackDBPath=C:\BizMan\Backend\BMBack.accdb - Change the
C:\BizMan\Backend\part to your networked path, e.g.,\\ServerPC\Bizman\Backend\.
- The line should look like this:
Similarly, find the line that starts with
ReportDBpath=.- The line should look like this:
ReportDBpath=C:\BizMan\Backend\BMReports.mdb - Change the
C:\BizMan\Backend\part to your networked path, e.g.,\\ServerPC\Bizman\Backend\.
- The line should look like this:
Save the Changes:
- Go to File > Save or press Ctrl + S to save the changes.
- Close Notepad.
Finished! The
BackDBPathandReportDBpathinbizman.iniare now updated to point to the networked server PC.
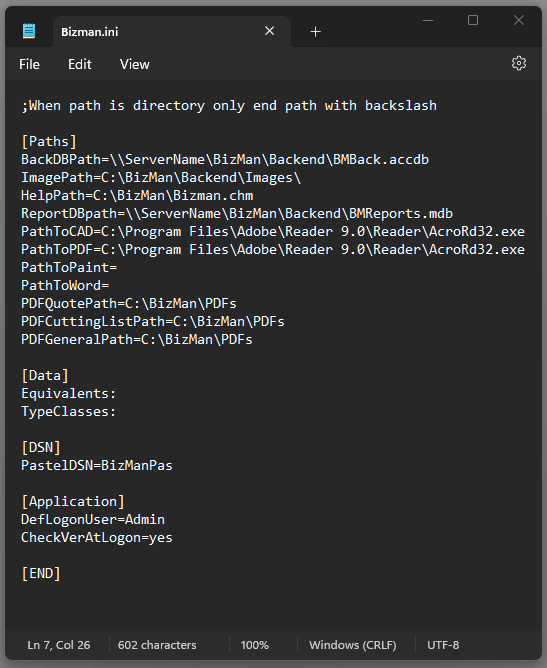
Remember: Ensure you have a backup of the original .ini file before making changes. Also, replace \\ServerPC\Bizman\ with the actual path to your server or shared location.
Step 3. Change the paths inside Bizman.
Start Bizman:
- Ensure you've already completed the prior steps and successfully updated the
bizman.inifile. - This next step needs to be done from just one PC.
- Ensure you've already completed the prior steps and successfully updated the
Access Advanced Settings in Bizman:
- Launch the Bizman application.
- Log in.
- Navigate to
System Admin -> Advanced Settings -> Paths.
Update the Required Paths:
- Find and change the
Backup folderpath:- From:
C:\Bizman\Backend\Backups - To:
\\ServerPC\Bizman\Backend\Backups
- From:
- Find and change the
Attachment DB Path:- From:
C:\BizMan\Backend\Attachments1.accdb - To:
\\ServerPC\Bizman\Backend\Attachments1.accdb
- From:
- Find and change the
Quote Image Folderpath:- From:
C:\BizMan\Backend\QuoteImages - To:
\\ServerPC\Bizman\Backend\QuoteImages
- From:
- Find and change the
Finished! The paths within Bizman's advanced settings are now updated to point to the networked server PC.
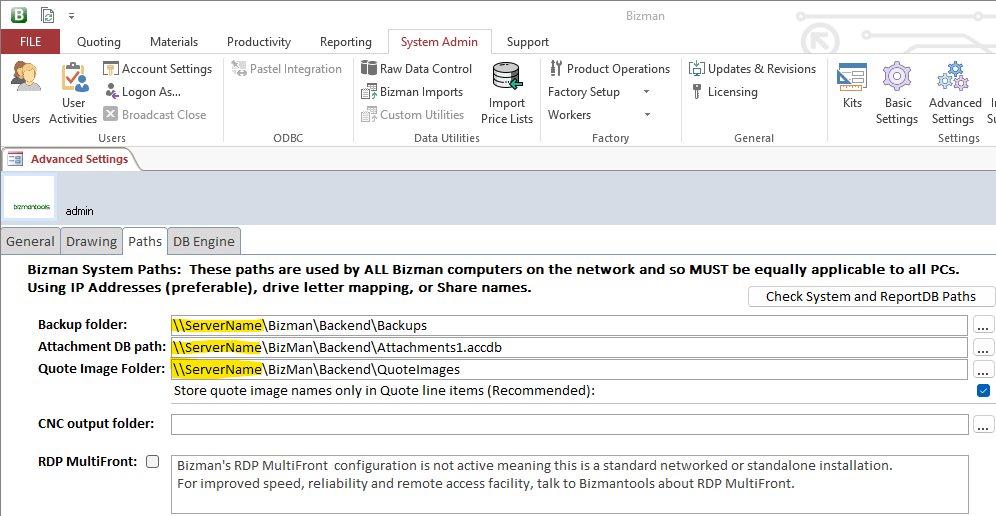
Remember to replace \\ServerPC\Bizman\ with the actual path to your server or shared location if it's different.
Network Setup complete!
Congratulations you have successfully setup a traditional network install.
RDP Server
To be added...