Core concepts
Cutting Lists
Cutting lists are reports that help you with the manufacturing process. They describe the lengths of profiles you need to cut in order to assemble the items you originally quoted on.
There are 2 fundementally different types of cutting list reports.
Non-Optimised
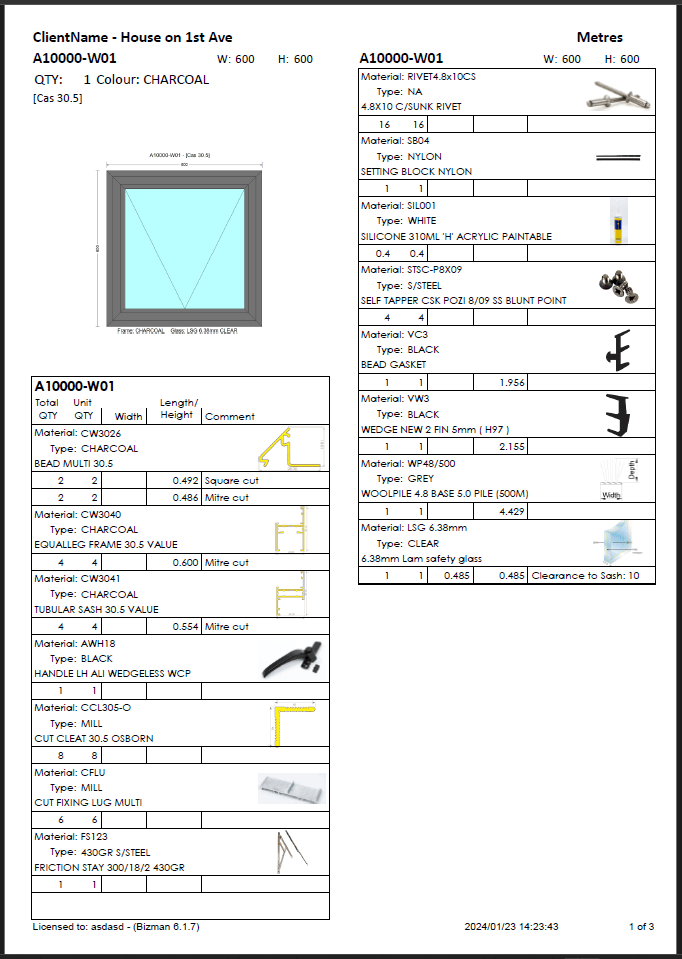
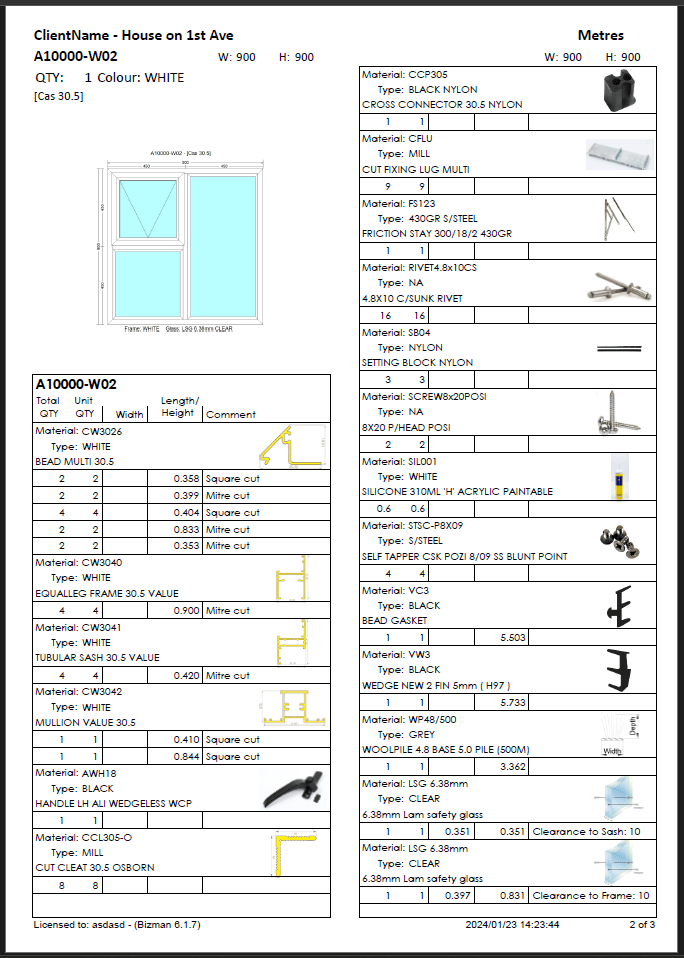
Non-Optimised cutting lists, also known as 'Job Cards', are reports which describes what lengths you need to cut. However it's up to you to determine HOW you will be cutting up your profiles.
Although in production you will likely want to be using Optimised cutting lists, these non-optimised job cards do serve a very useful purpose early on!
Since job cards are 'item' based not 'project' based. You can more easily check the correctness of your Bizman setup with these non-optimised cutting lists.
Use Non-Optimised in the beginning
One of the primary ways to ensure your Bizman is setup correctly, is to quote on an item. Then check the FULL MATERIAL job card for that item.
This way you can make sure the materials in your drawings are correct!
Creating Job cards
Location: Quoting -> Quote Projects -> Project Header -> Reports
Click the Cutting Lists + button
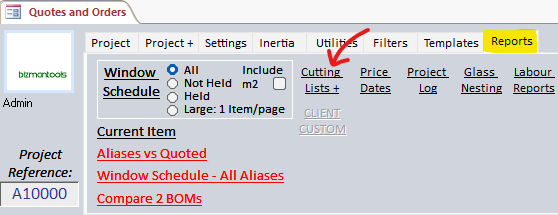
This will bring up the Job Card creation form.
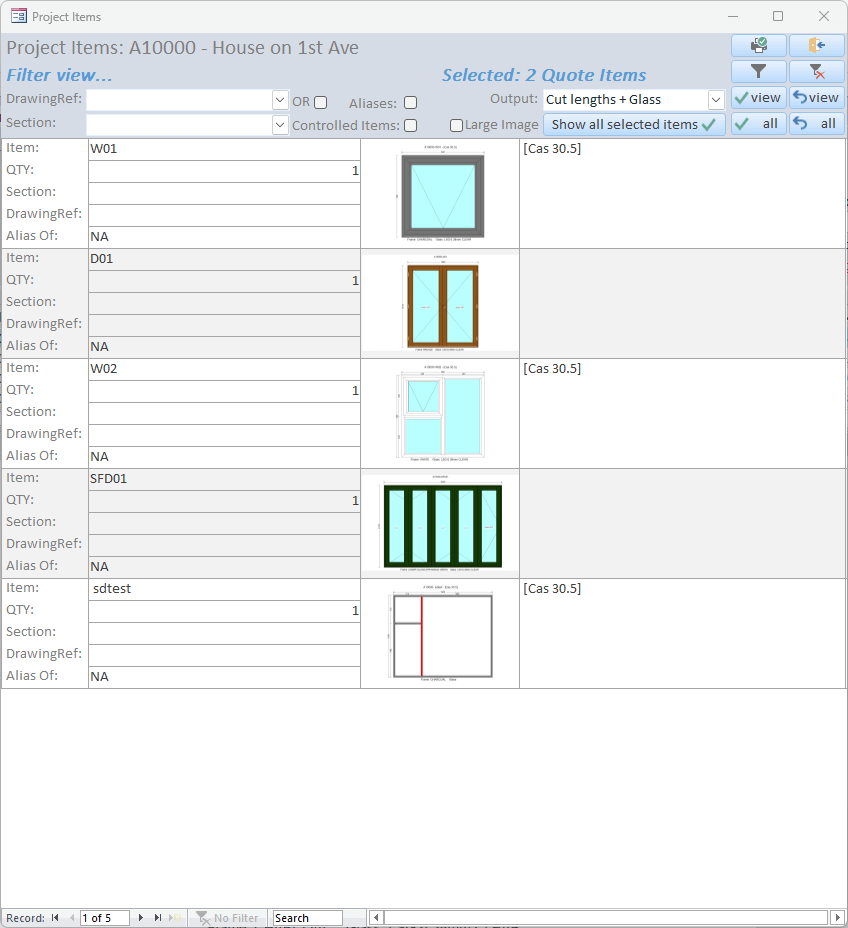
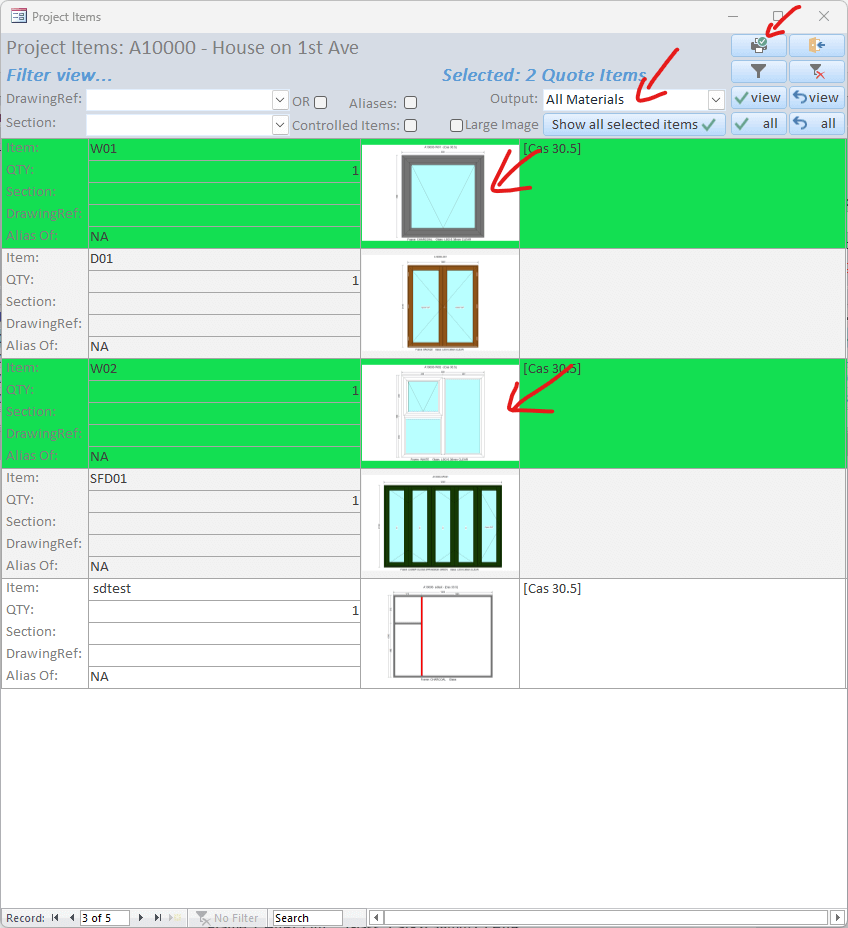
- Select the items you want
- Select the output type
- Press the print icon
Filtering
You can filter by:
- DrawingRef (architects drawing number)
- Section (grouping of quote items, lounge, kitchen etc.)
- Aliases (final revisions of the items adjusted for real world dimensions)
- Controlled items (items you don't normally make but buy prebuilt)
Take note that the default behaviour is to filter by DrawingRef OR Section, but you can change that to be AND by ticking the checkbox next to OR.
You can also set the images to be Large Image by ticking the corresponding checkbox.
After filtering you can select everything in view using the TICK VIEW button. (Select view or undo selection for view) or you could simply Select everything with the TICK ALL button.

Optimised
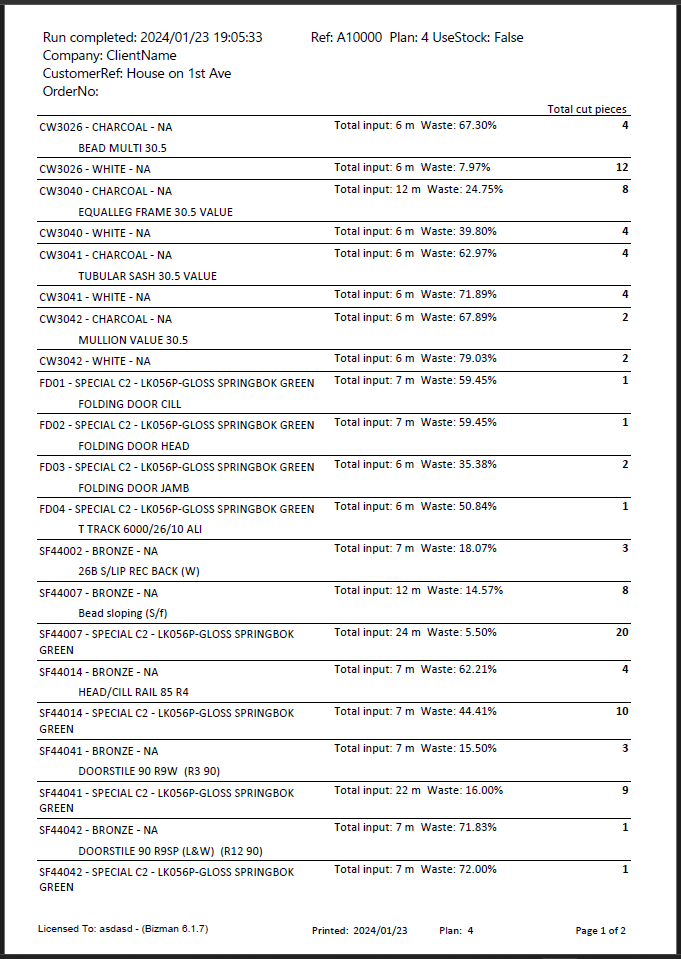
Optimised cutting lists are what you should be using once you're fully setup and comfortable with Bizman. These reports also show you what you need to cut (just like the non-optimised cutting lists) but they look at the entire project, and figure out the best way to cut all of your profiles so you get the least amount of waste and the most useable offcuts.
They are generated automatically with purchase orders, or you can manually create them.
Automatic
Bizman automatically creates optimised cutting lists for you whenever you make an appropriate purchase order!
See Purchasing on how to create a purchase order.
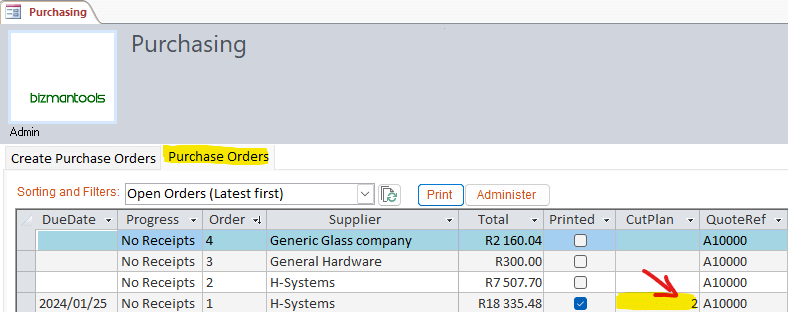
Materials -> Purchase Orders -> Purchase Orders (Tab)
Simply double click on the CutPlan number to open the automatically generated optimised cutting list.
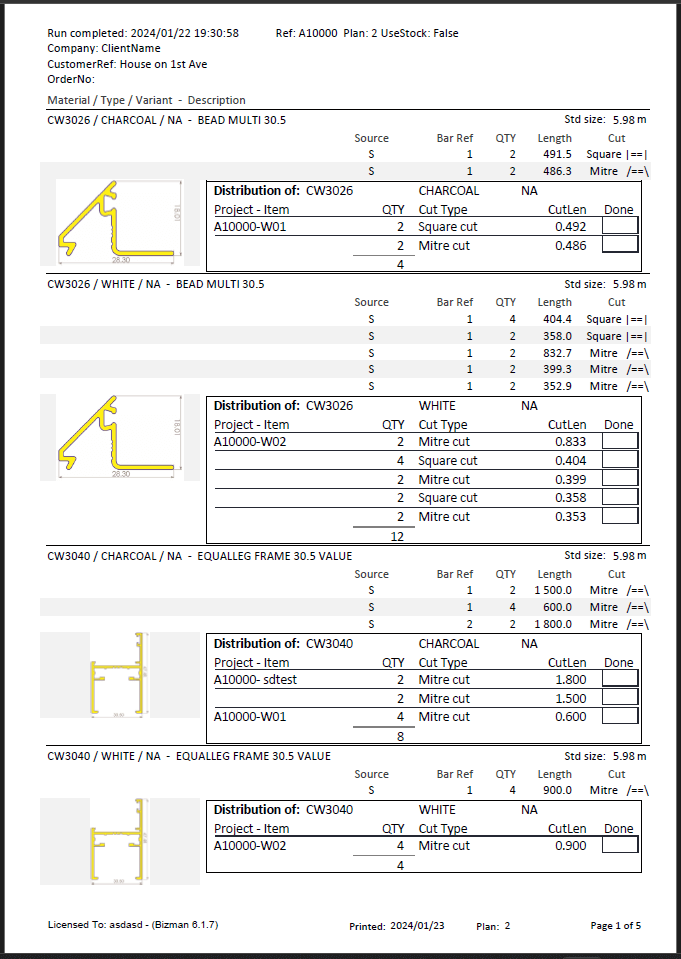
Below you see the 'Bar Style' report (report per length) with distribution list included.
Below is an alternative style which is 'Per Cut' with distribution list included.
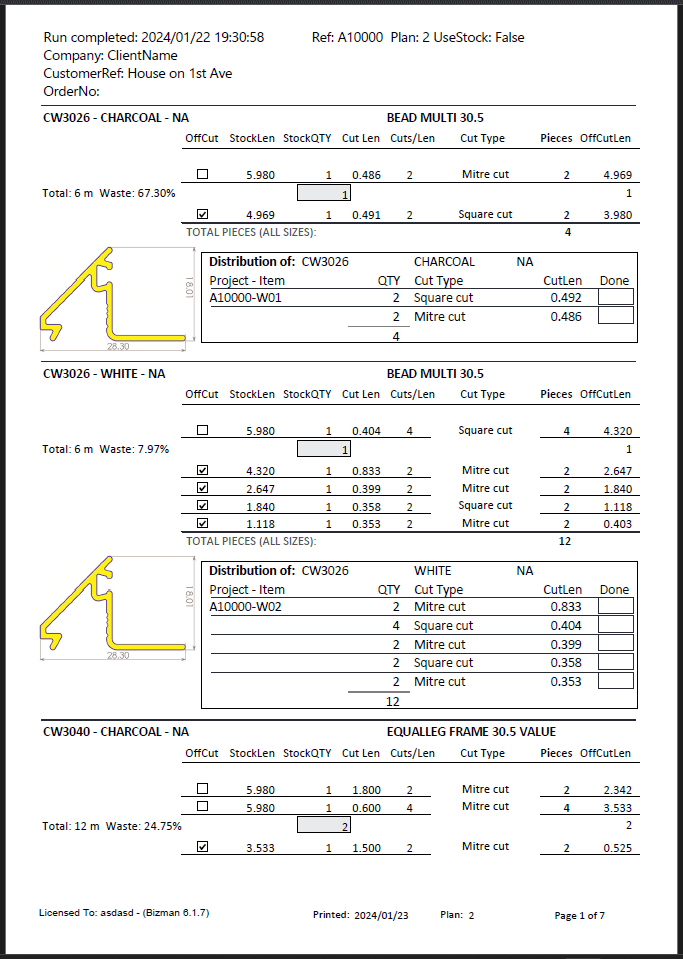
Report Layout
The report will open in your default report style.
There are a few different styles of optimised reports, you can set your preferred style in Advanced Settings -> Paths -> Optimised Cutting list
Manual
You can also manually create optimised cutting lists, let's navigate to:
Reporting -> Optimisation -> Create an Optimised Cutting Plan

Below you will see the Optimisation screen which is where we can create and view existing optimised cutting lists and reports.
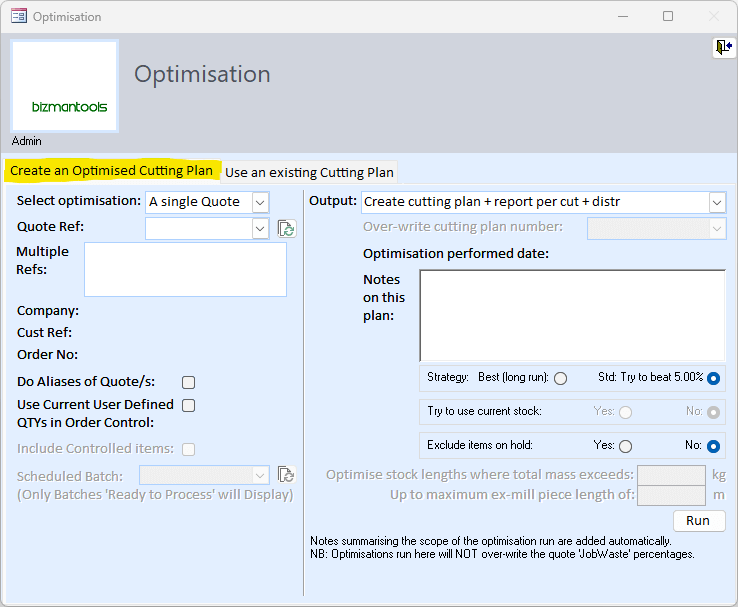
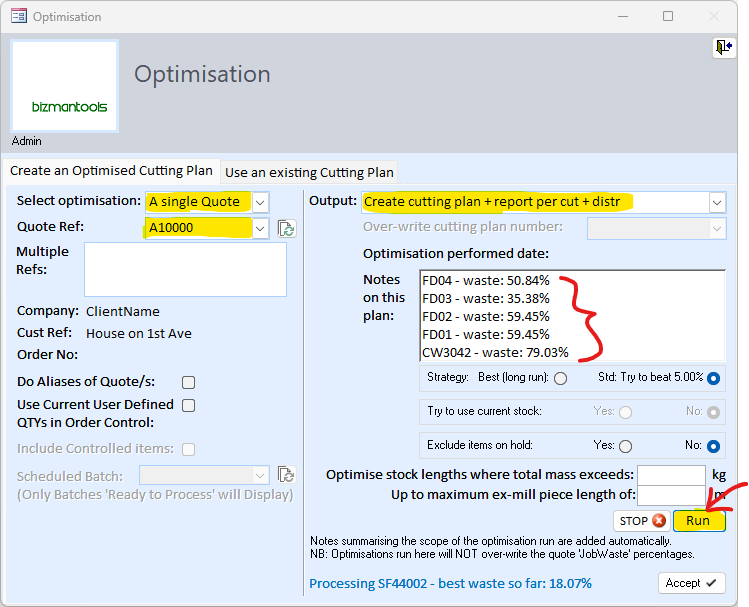
To manually create an optimised cutting list, simply:
- Select Optimisation Type (A single quote or span multiple projects)
- Select Quote Ref or Refs
- Select desired output
- Press
RUN
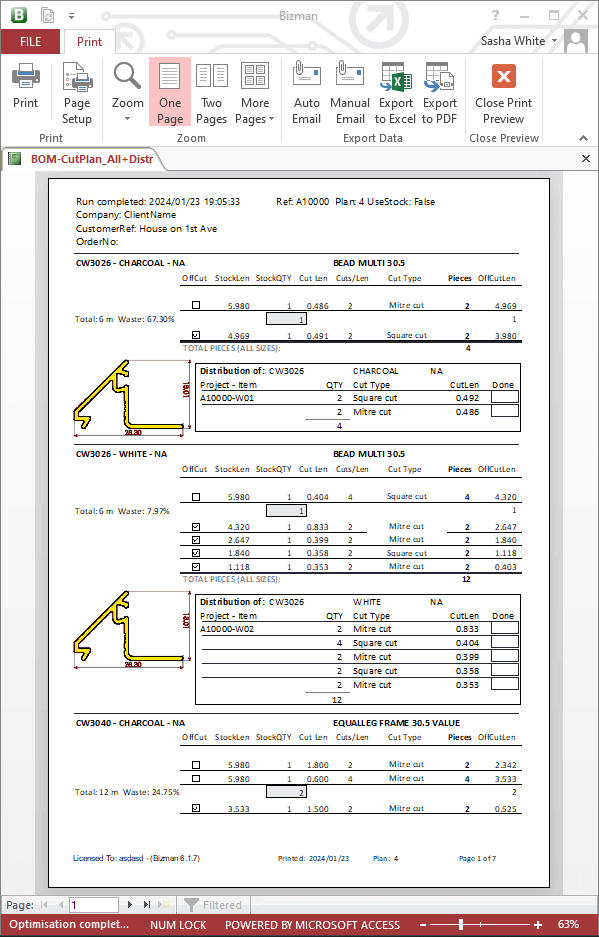
a compressed print preview is shown below, you can view multiple pages at a time, print, email or export to PDF!
Where are existing reports?
All optimised cutting lists (including automatic) is under the "Use an existing cutting plan" tab
Opening existing reports
Once you have made a report automatically or manually they are stored in this Optimisation screen under the "Use an existing Cutting Plan" tab.
Reporting -> Optimisation -> Use an existing Cutting Plan
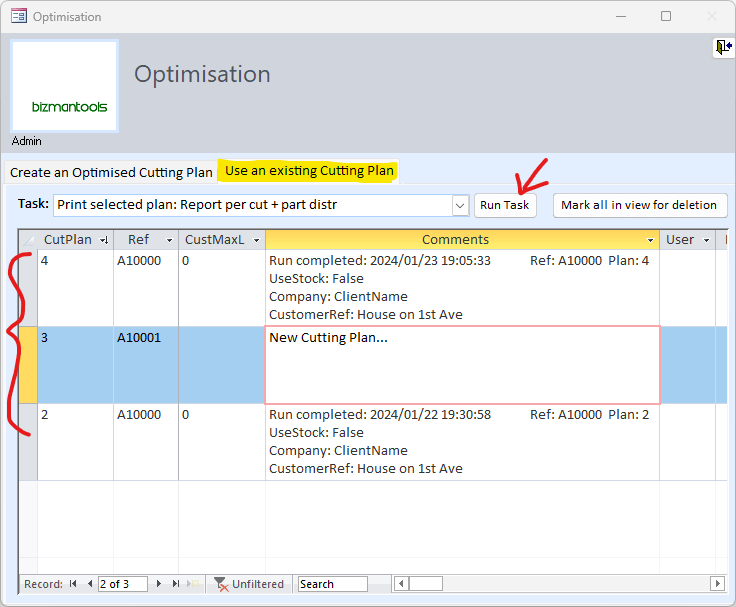
- Simply left click the report you want to open
- Select a
Taskfrom the drop down list (these tasks contain various styles of cutting lists as well as other reports) - Press
RUN TASK

Apply cost to quote
Since optimised cutting lists determine the real waste of a project, you can decide to apply that to your project costing!
Your costing normally applies a standard WASTE setting from your Basic Settings. This is appropriate for most jobs, however if you did a project in a unique colour you might want to include the real waste into your quoation (as you are not likely to reuse the offcuts in other jobs)
Including Real Waste into Cost?
Most of the time your projects will become more expensive as the real waste is generally higher than the average 10% or so that you have in Basic Settings.
However on large projects sometimes your cost can decrease as the optimised cutting list can produce off cuts of less than your standard 10%
Related Reports
The act of running optimisations also brings with it additional useful reports, see some of them below.
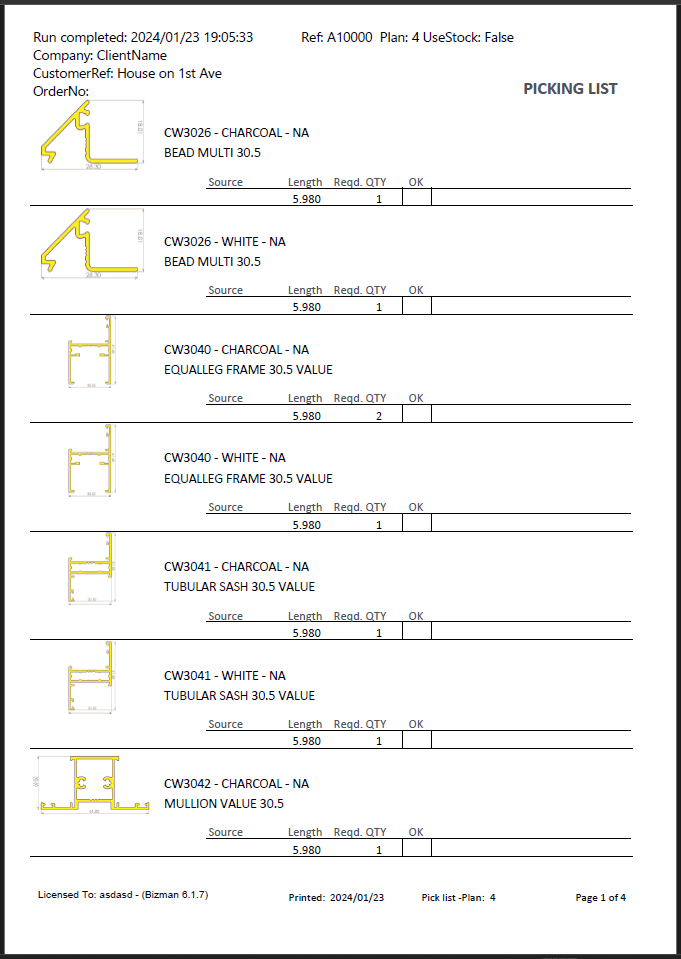
Picking List
From the Use existing cutting lists screen open the drop down and select Picking List
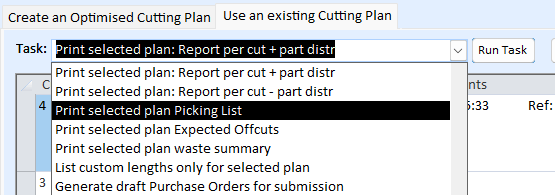
Picking list report shown below:
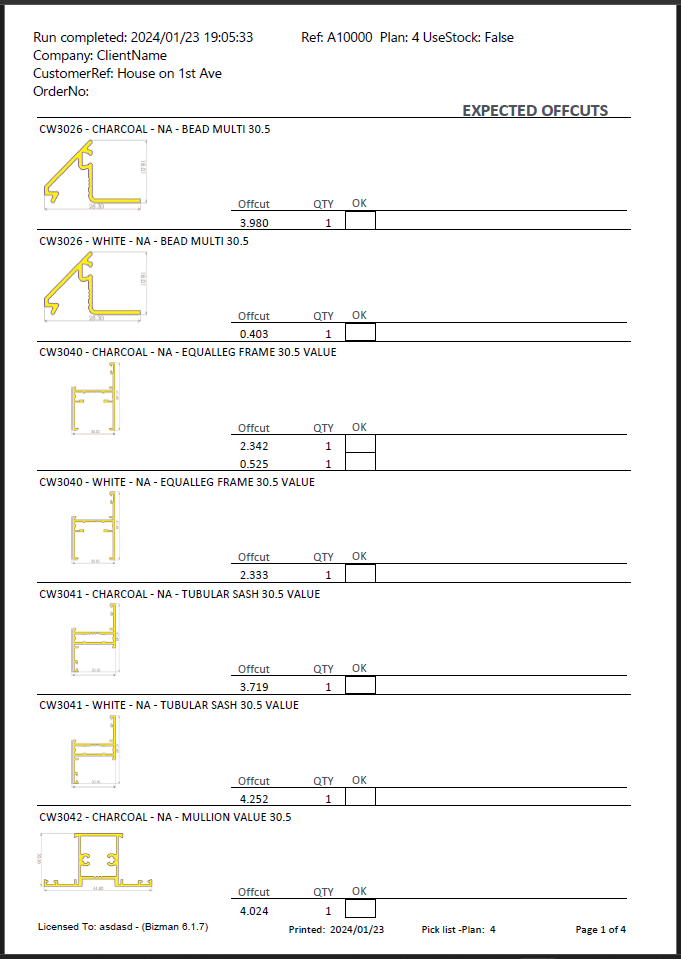
Expected Offcuts
From the Use existing cutting lists screen open the drop down and select Expected Offcuts
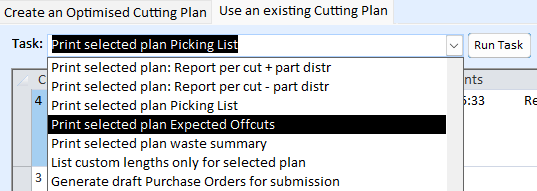
Expected Offcuts report shown below:
Waste Summary

Waste summary report shown below:
